Blueprint: Shareable Maps (Next.js)
In this technical guide, we’ll walk you through setting up a shareable maps application using Next.js and Geobase, leveraging modern web technologies to create a robust mapping solution.
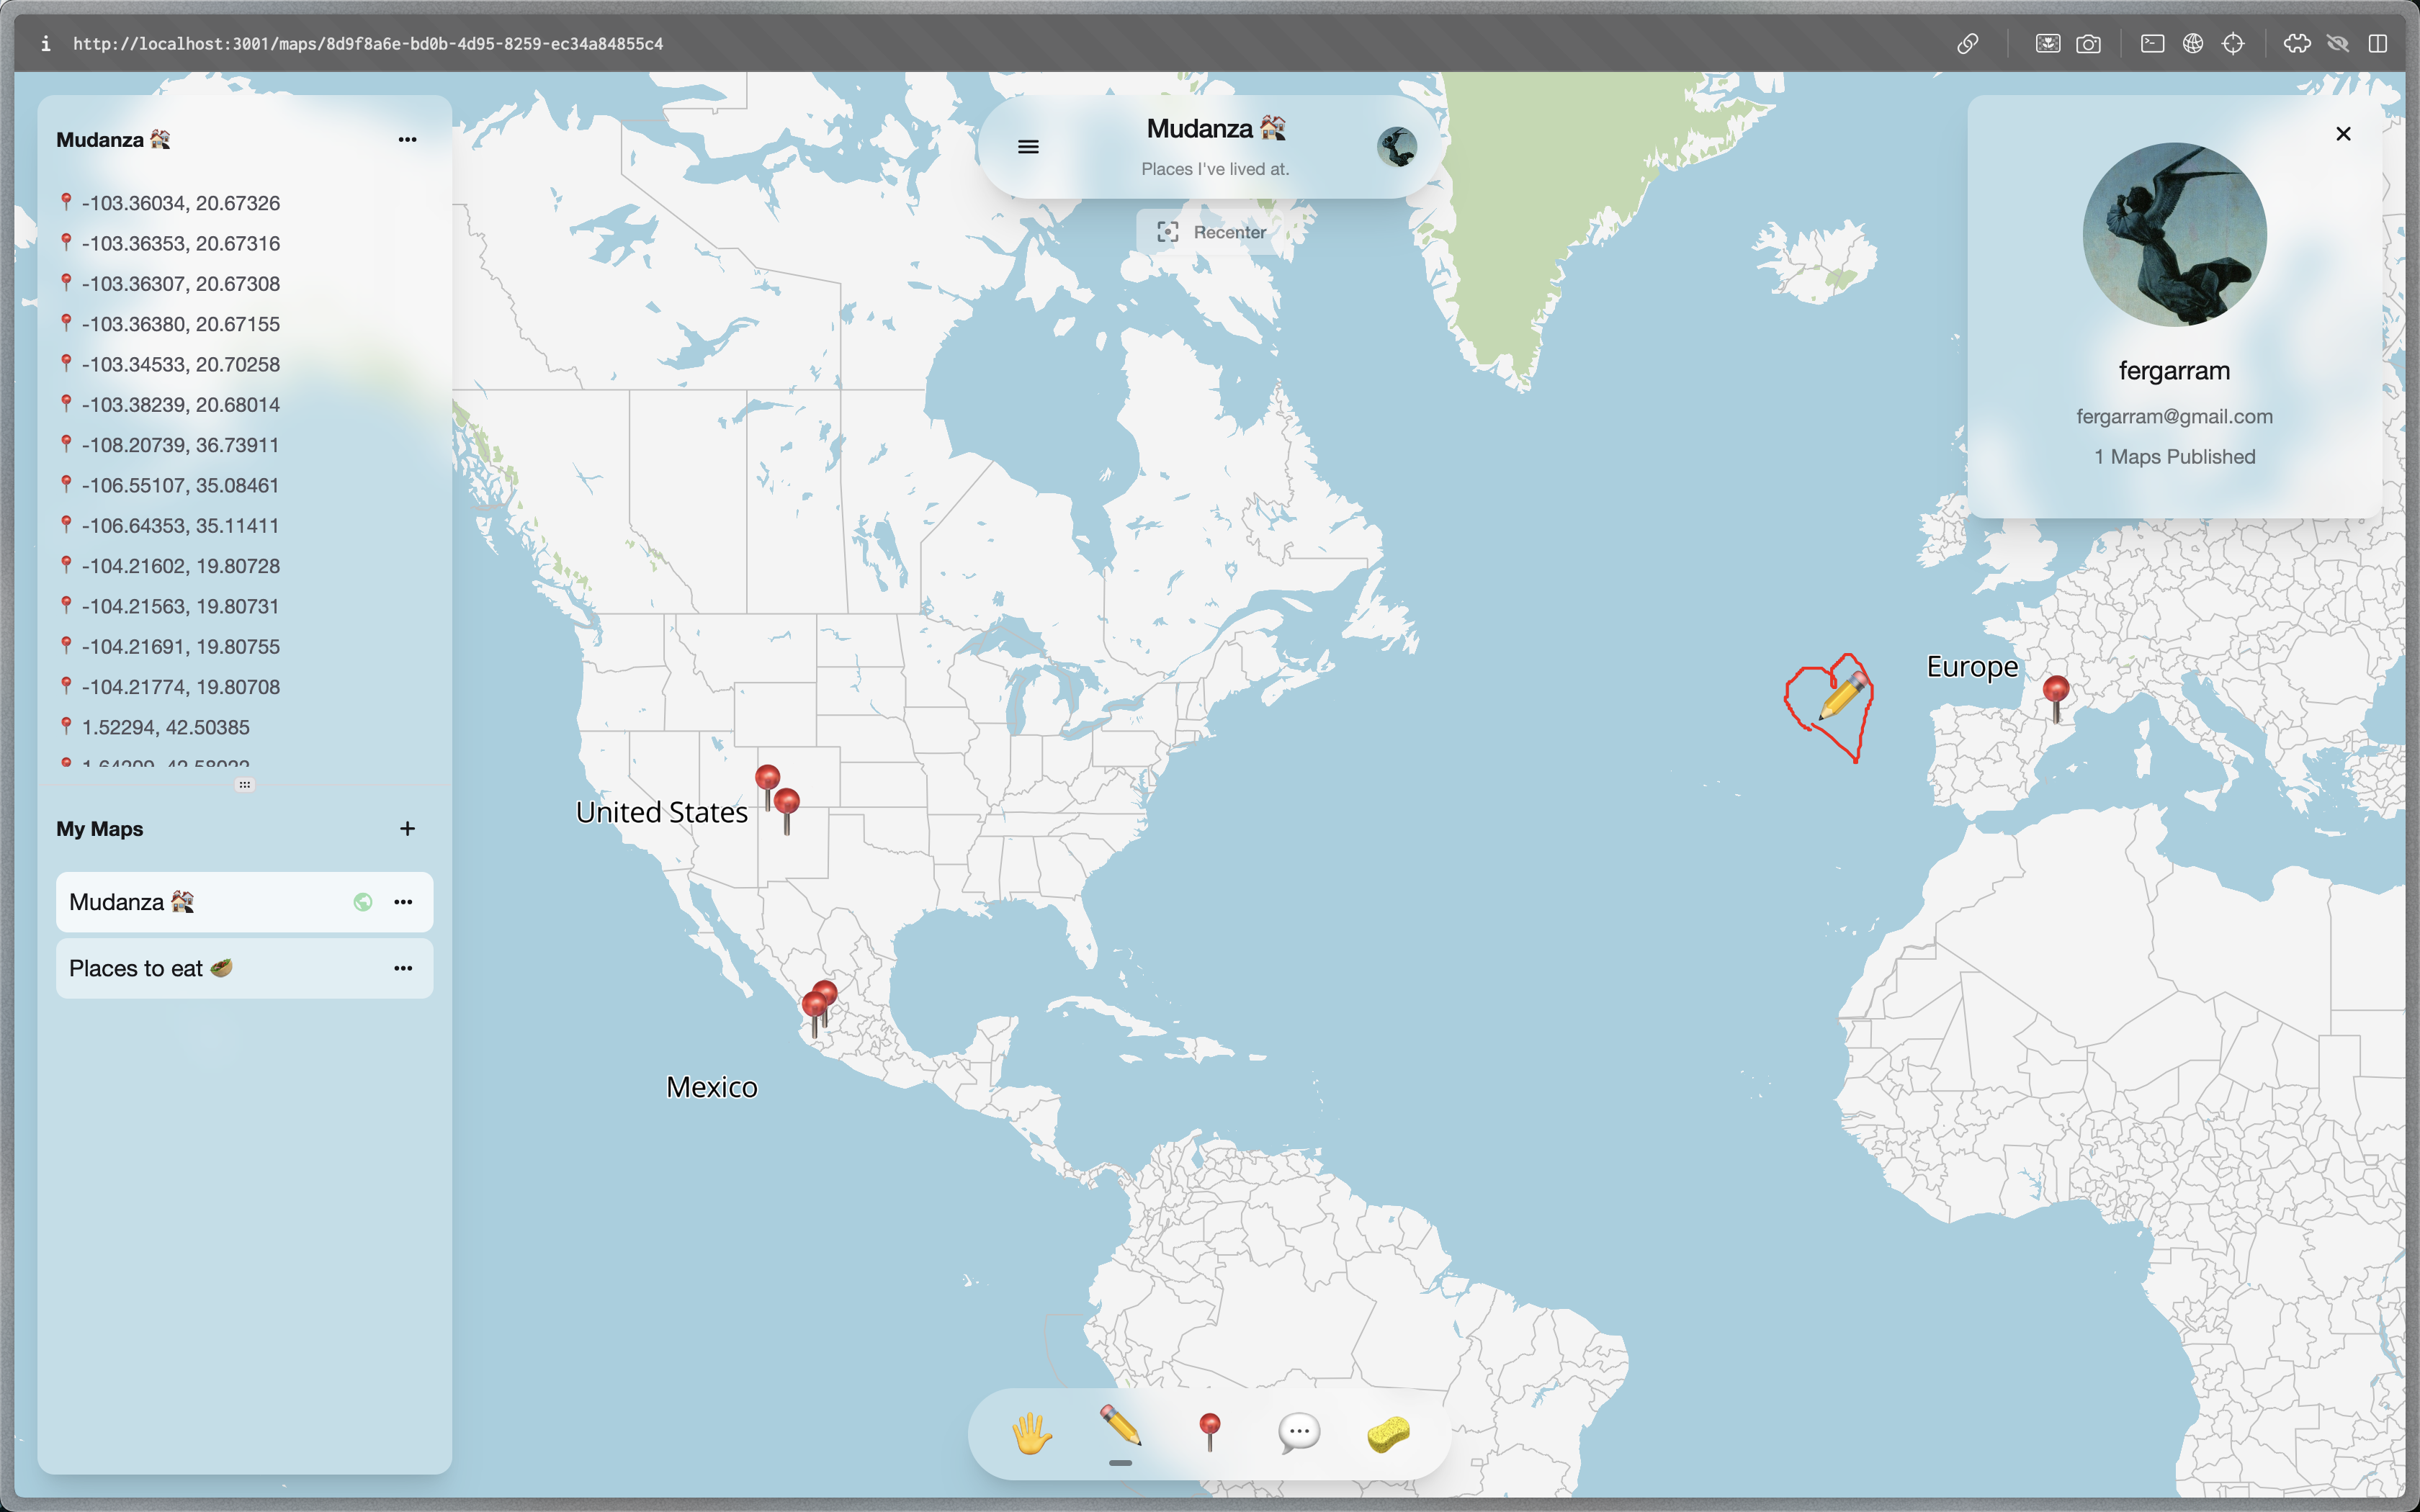
What’s Included
To kick things off, ensure you have an account on Geobase. Once you’re signed up, create a new project. With your Geobase project ready:
- Initialize your project: Use this template to create a new repository. This action generates a fresh copy of the repository without any commit history.
- Configure environment and settings: Follow the steps below to set up and run the project.
Ensure your Geobase project is properly configured before proceeding.
Development
Migration
Set up your database using either psql or the Geobase Studio.
Option 1: Using psql
- Verify your
psqlversion is compatible with the Geobase project (Postgres 14 or 15). - Set the
DATABASE_URIusing the URI from your Geobase project settings:export DATABASE_URI=<your-database-uri> - Execute the initial migration file to set up the database:
psql -d $DATABASE_URI -f geobase/migrations/20240813165645_project-setup.sql
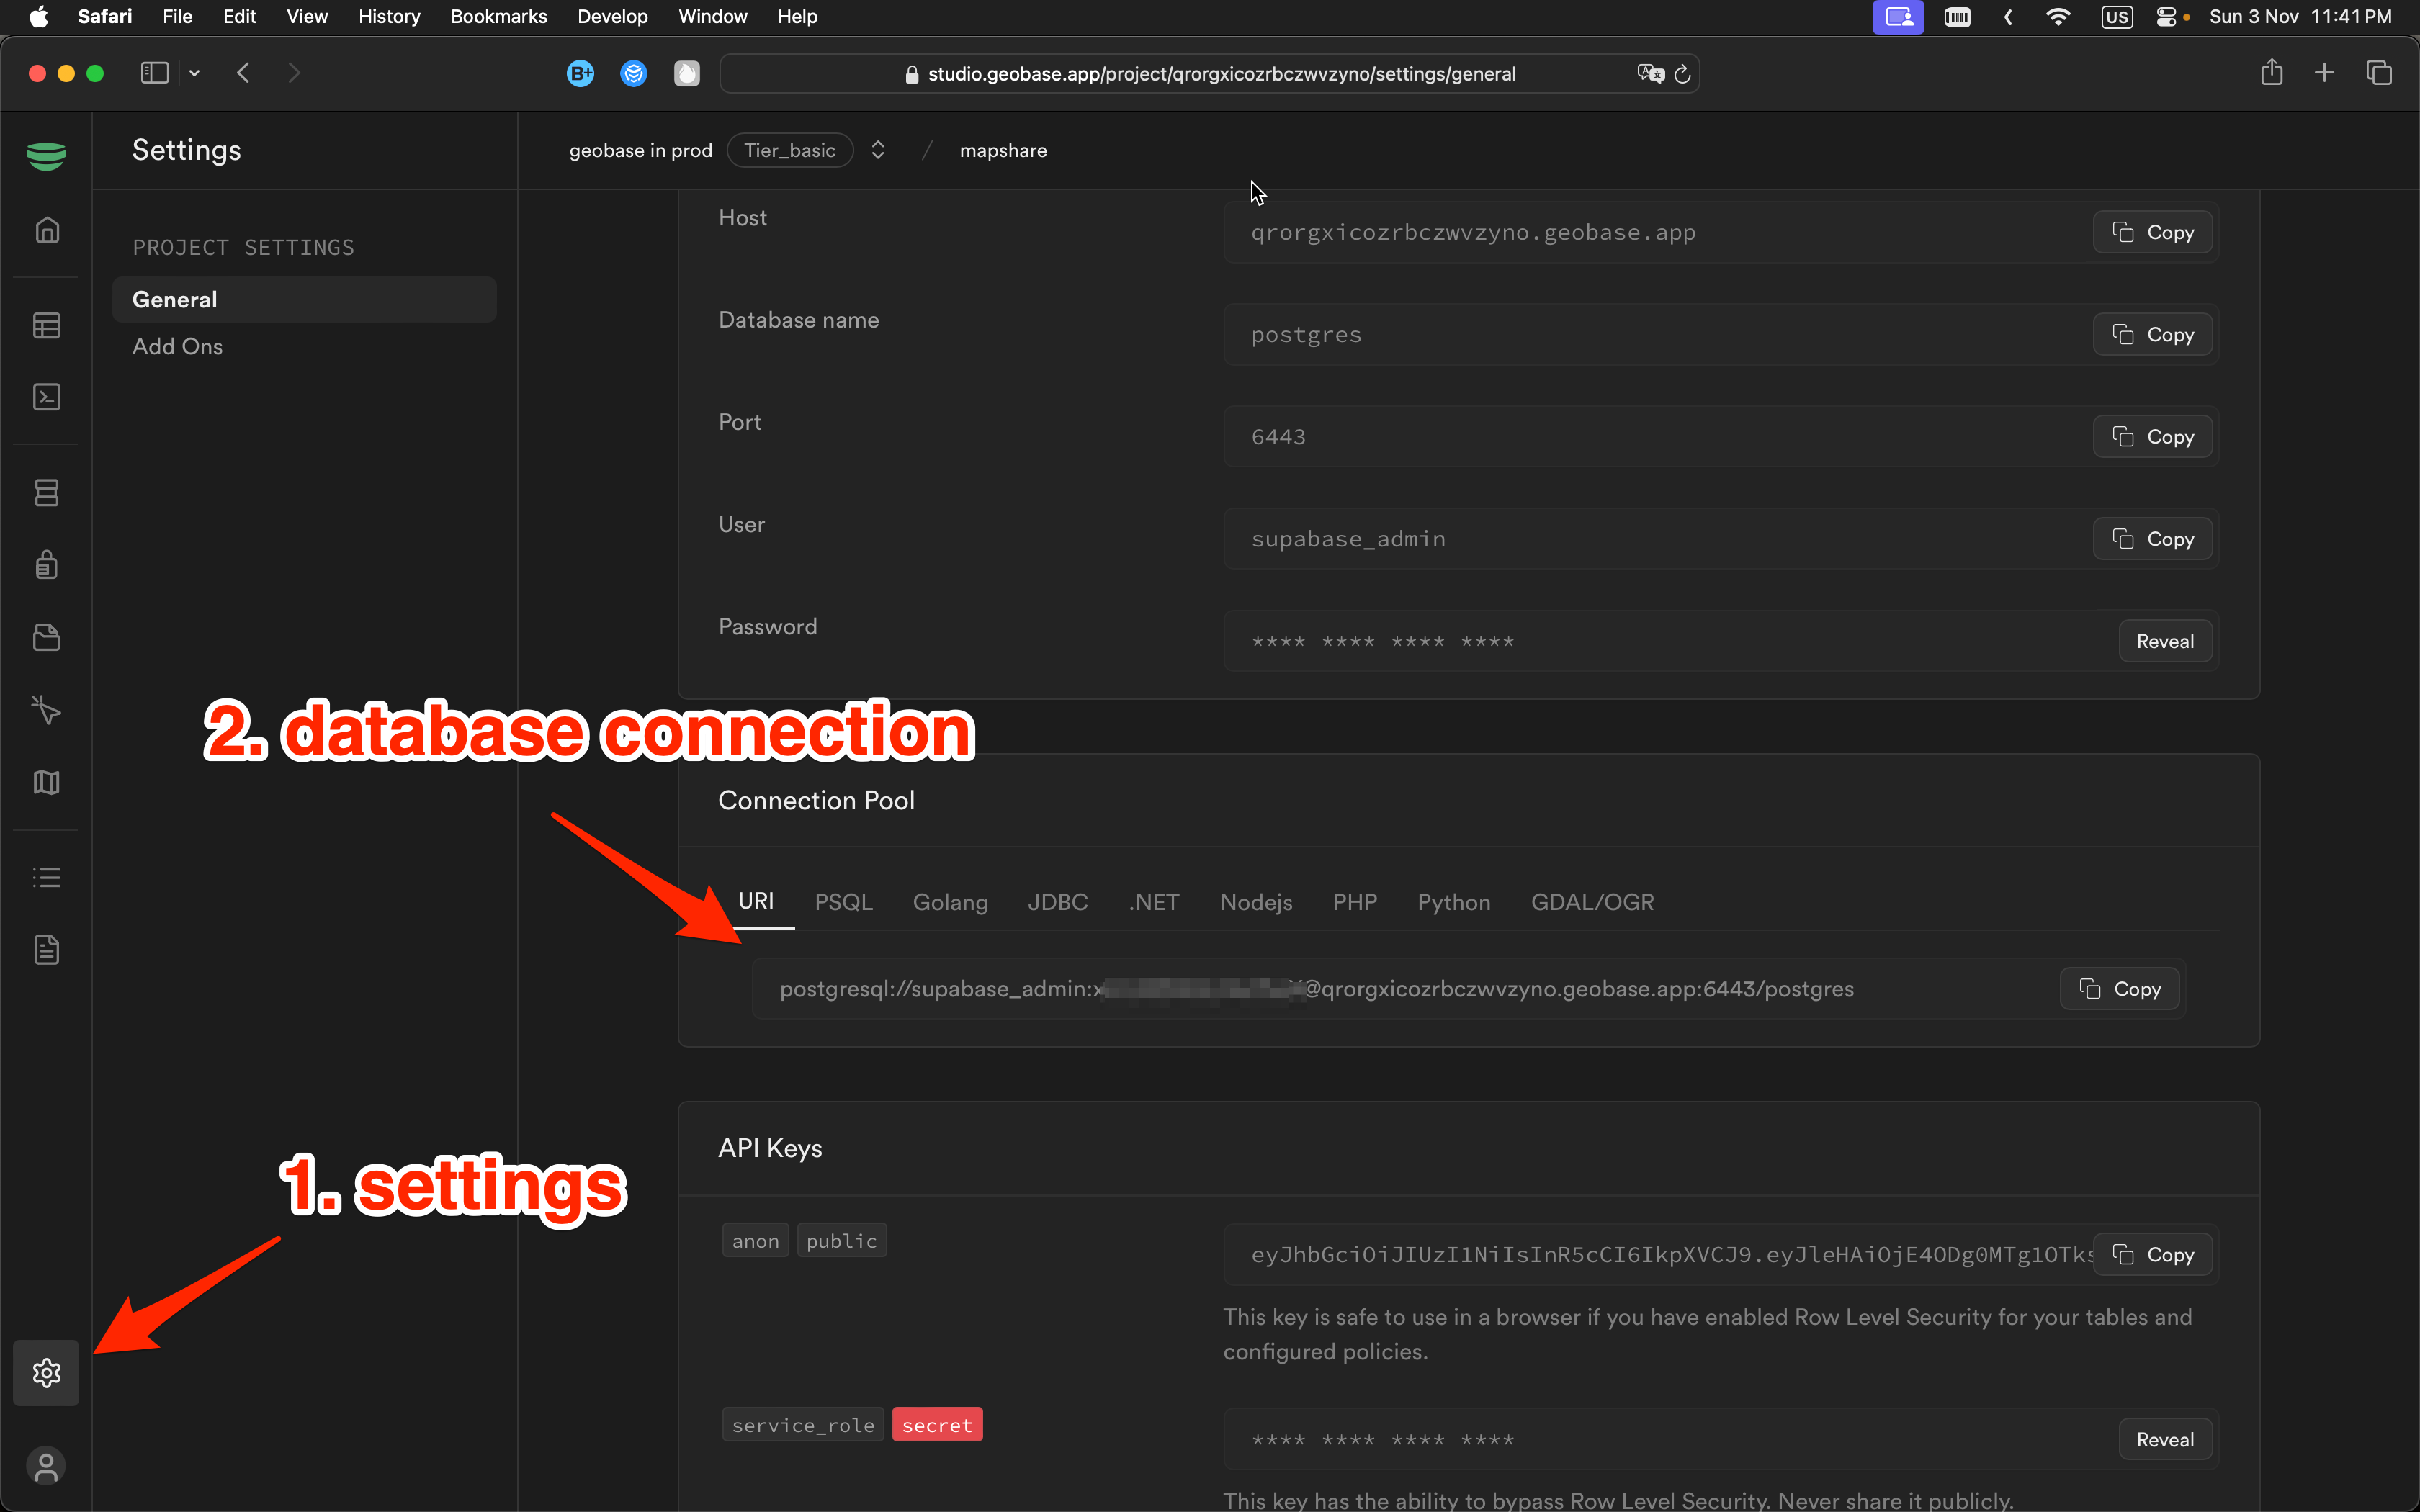
Option 2: Using Studio
- Navigate to the SQL Editor: Open the Geobase Studio, go to the SQL Editor, and open the setup migration file.
- Copy & Run the Migration: Copy the migration SQL script contents and execute it directly in the editor.
Environment Variables
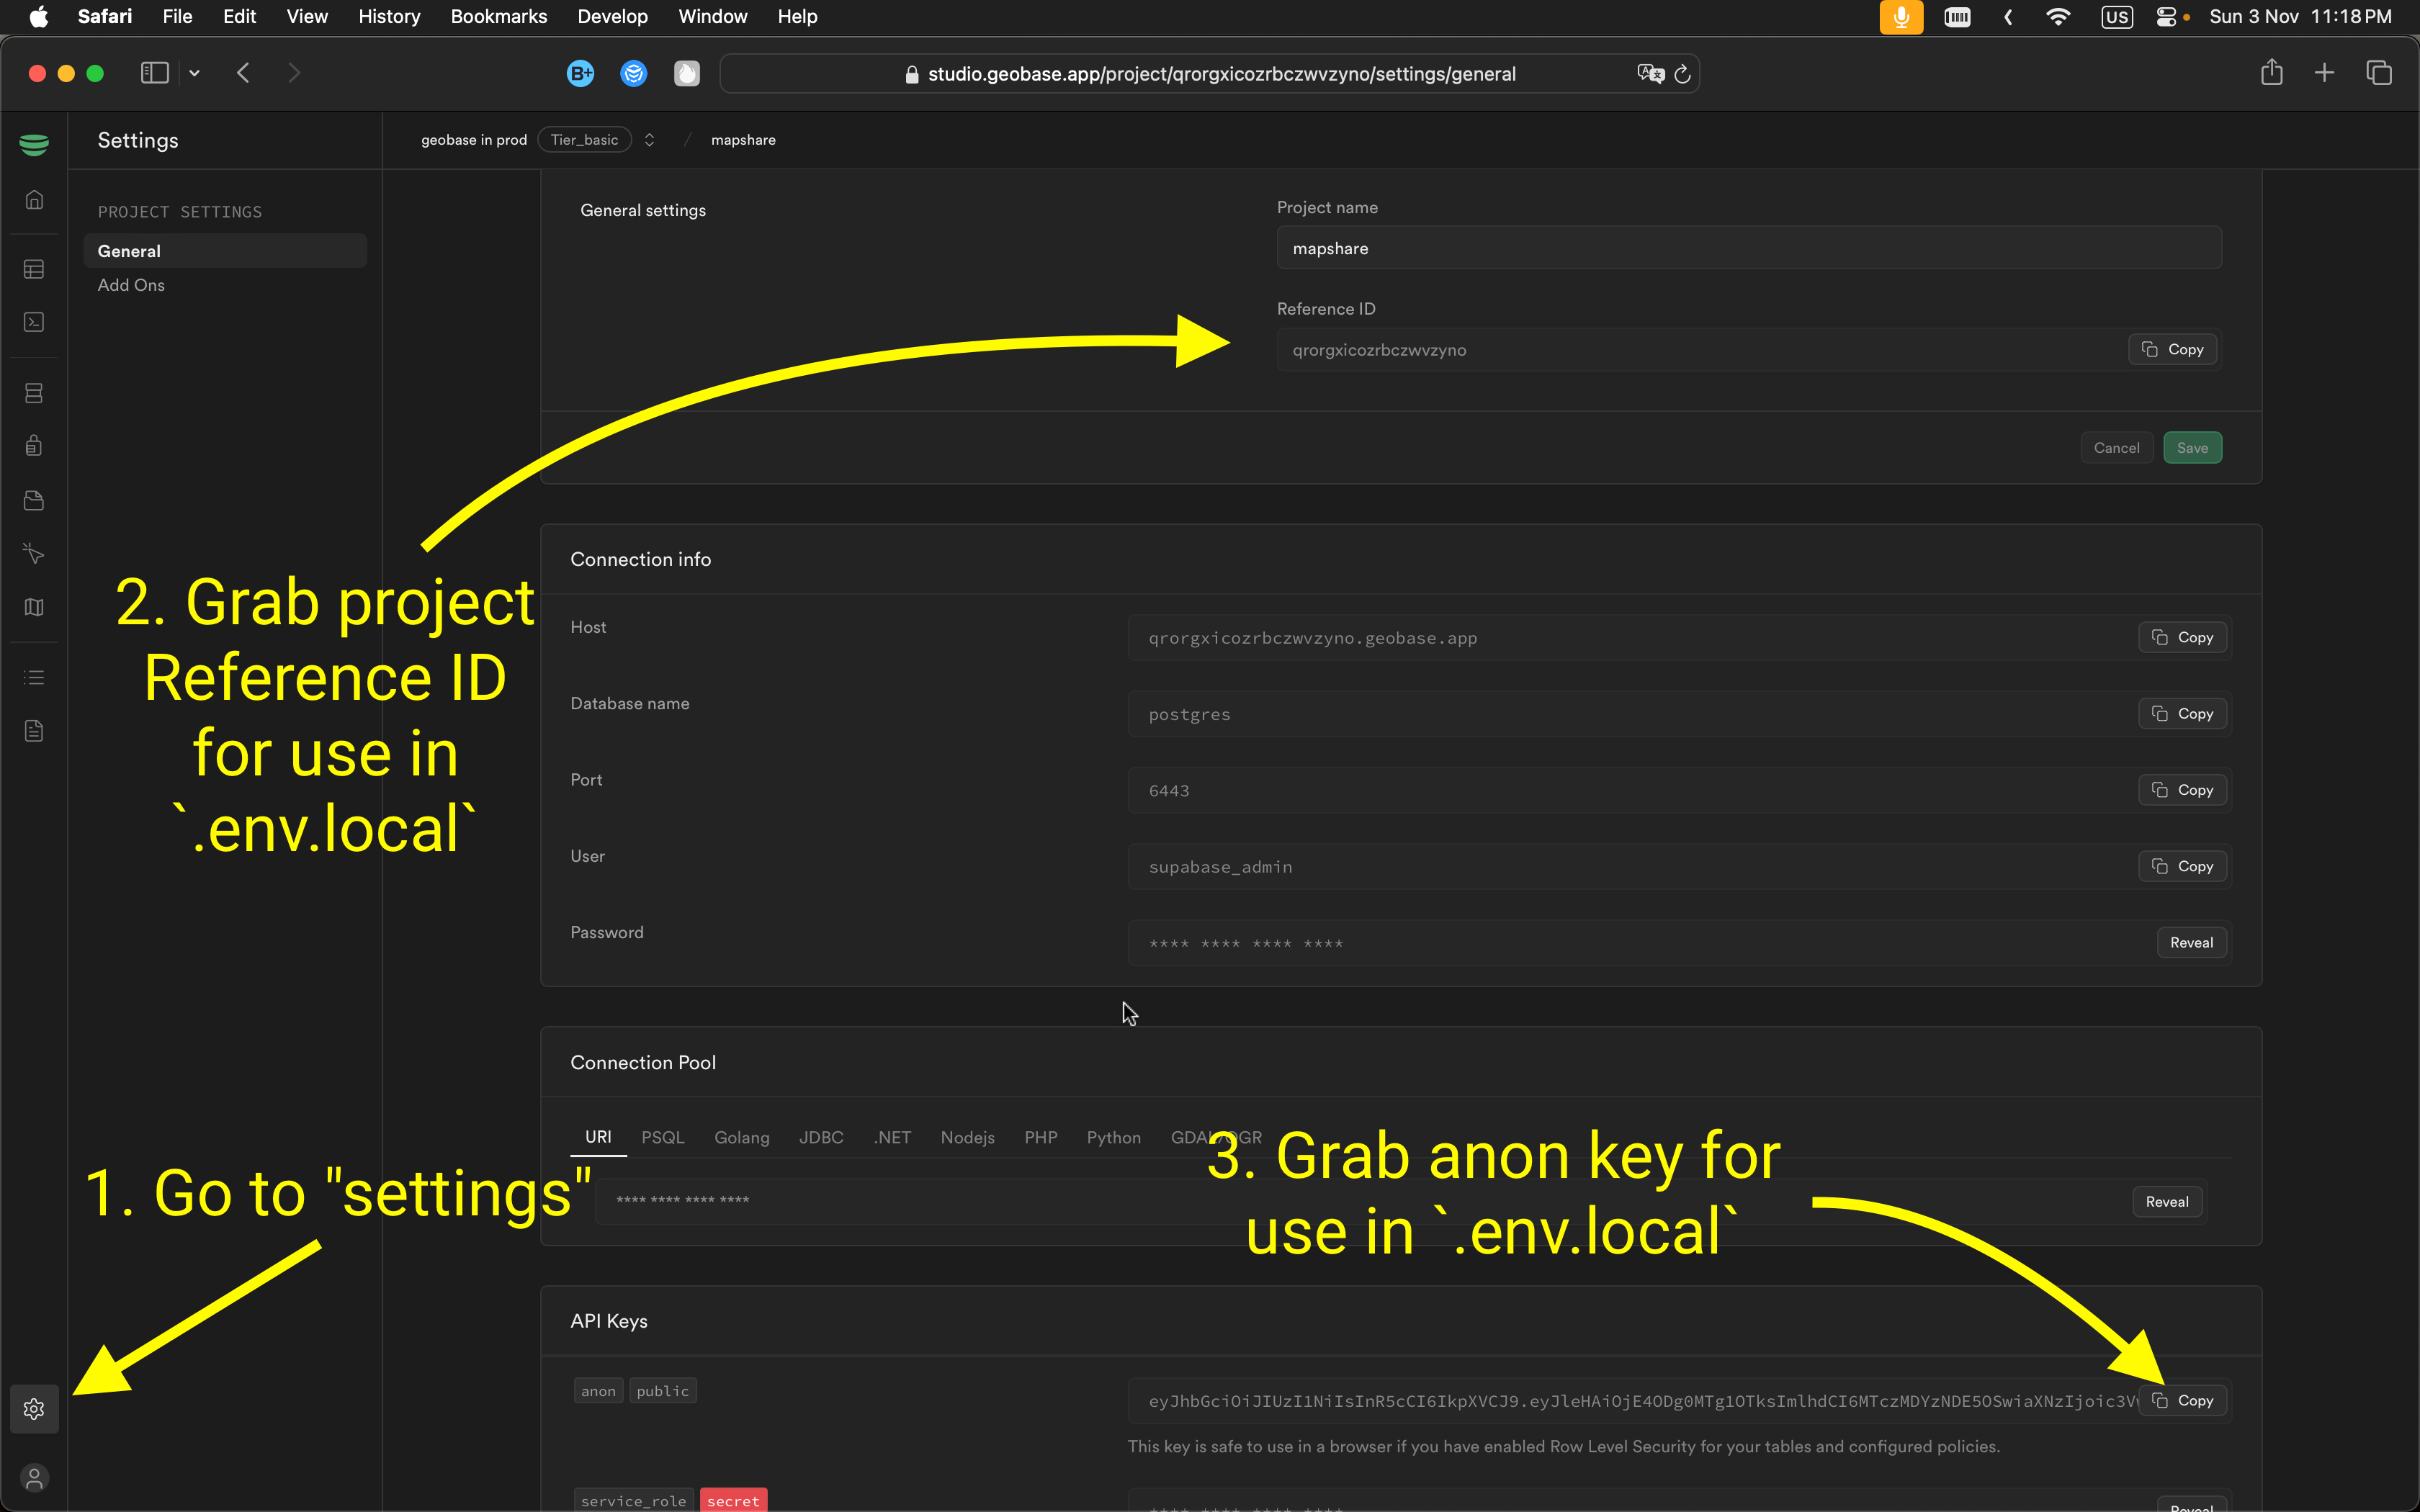
To connect your app to Geobase, configure these environment variables. Include them in a .env.local file for local development.
NEXT_PUBLIC_GEOBASE_URL=https://YOUR_PROJECT_REF.geobase.app
NEXT_PUBLIC_GEOBASE_ANON_KEY=YOUR_GEOBASE_PROJECT_ANON_KEY
You can locate the project reference and anon key in your Geobase project settings.
Local Development
- Set Node.js version: Use Node version 21:
nvm use 21 - Install dependencies: Use your preferred package manager:
npm install # or yarn # or pnpm install - Start the development server with HTTPS enabled:
npm run dev -- --experimental-https
# or
yarn dev --experimental-https
# or
pnpm dev --experimental-https
Note: Without --experimental-https, the email verification links might redirect to https://localhost:3000/..., causing errors. You can navigate manually by removing https from the URL if needed.
Access the project at https://localhost:3000.
Local Development
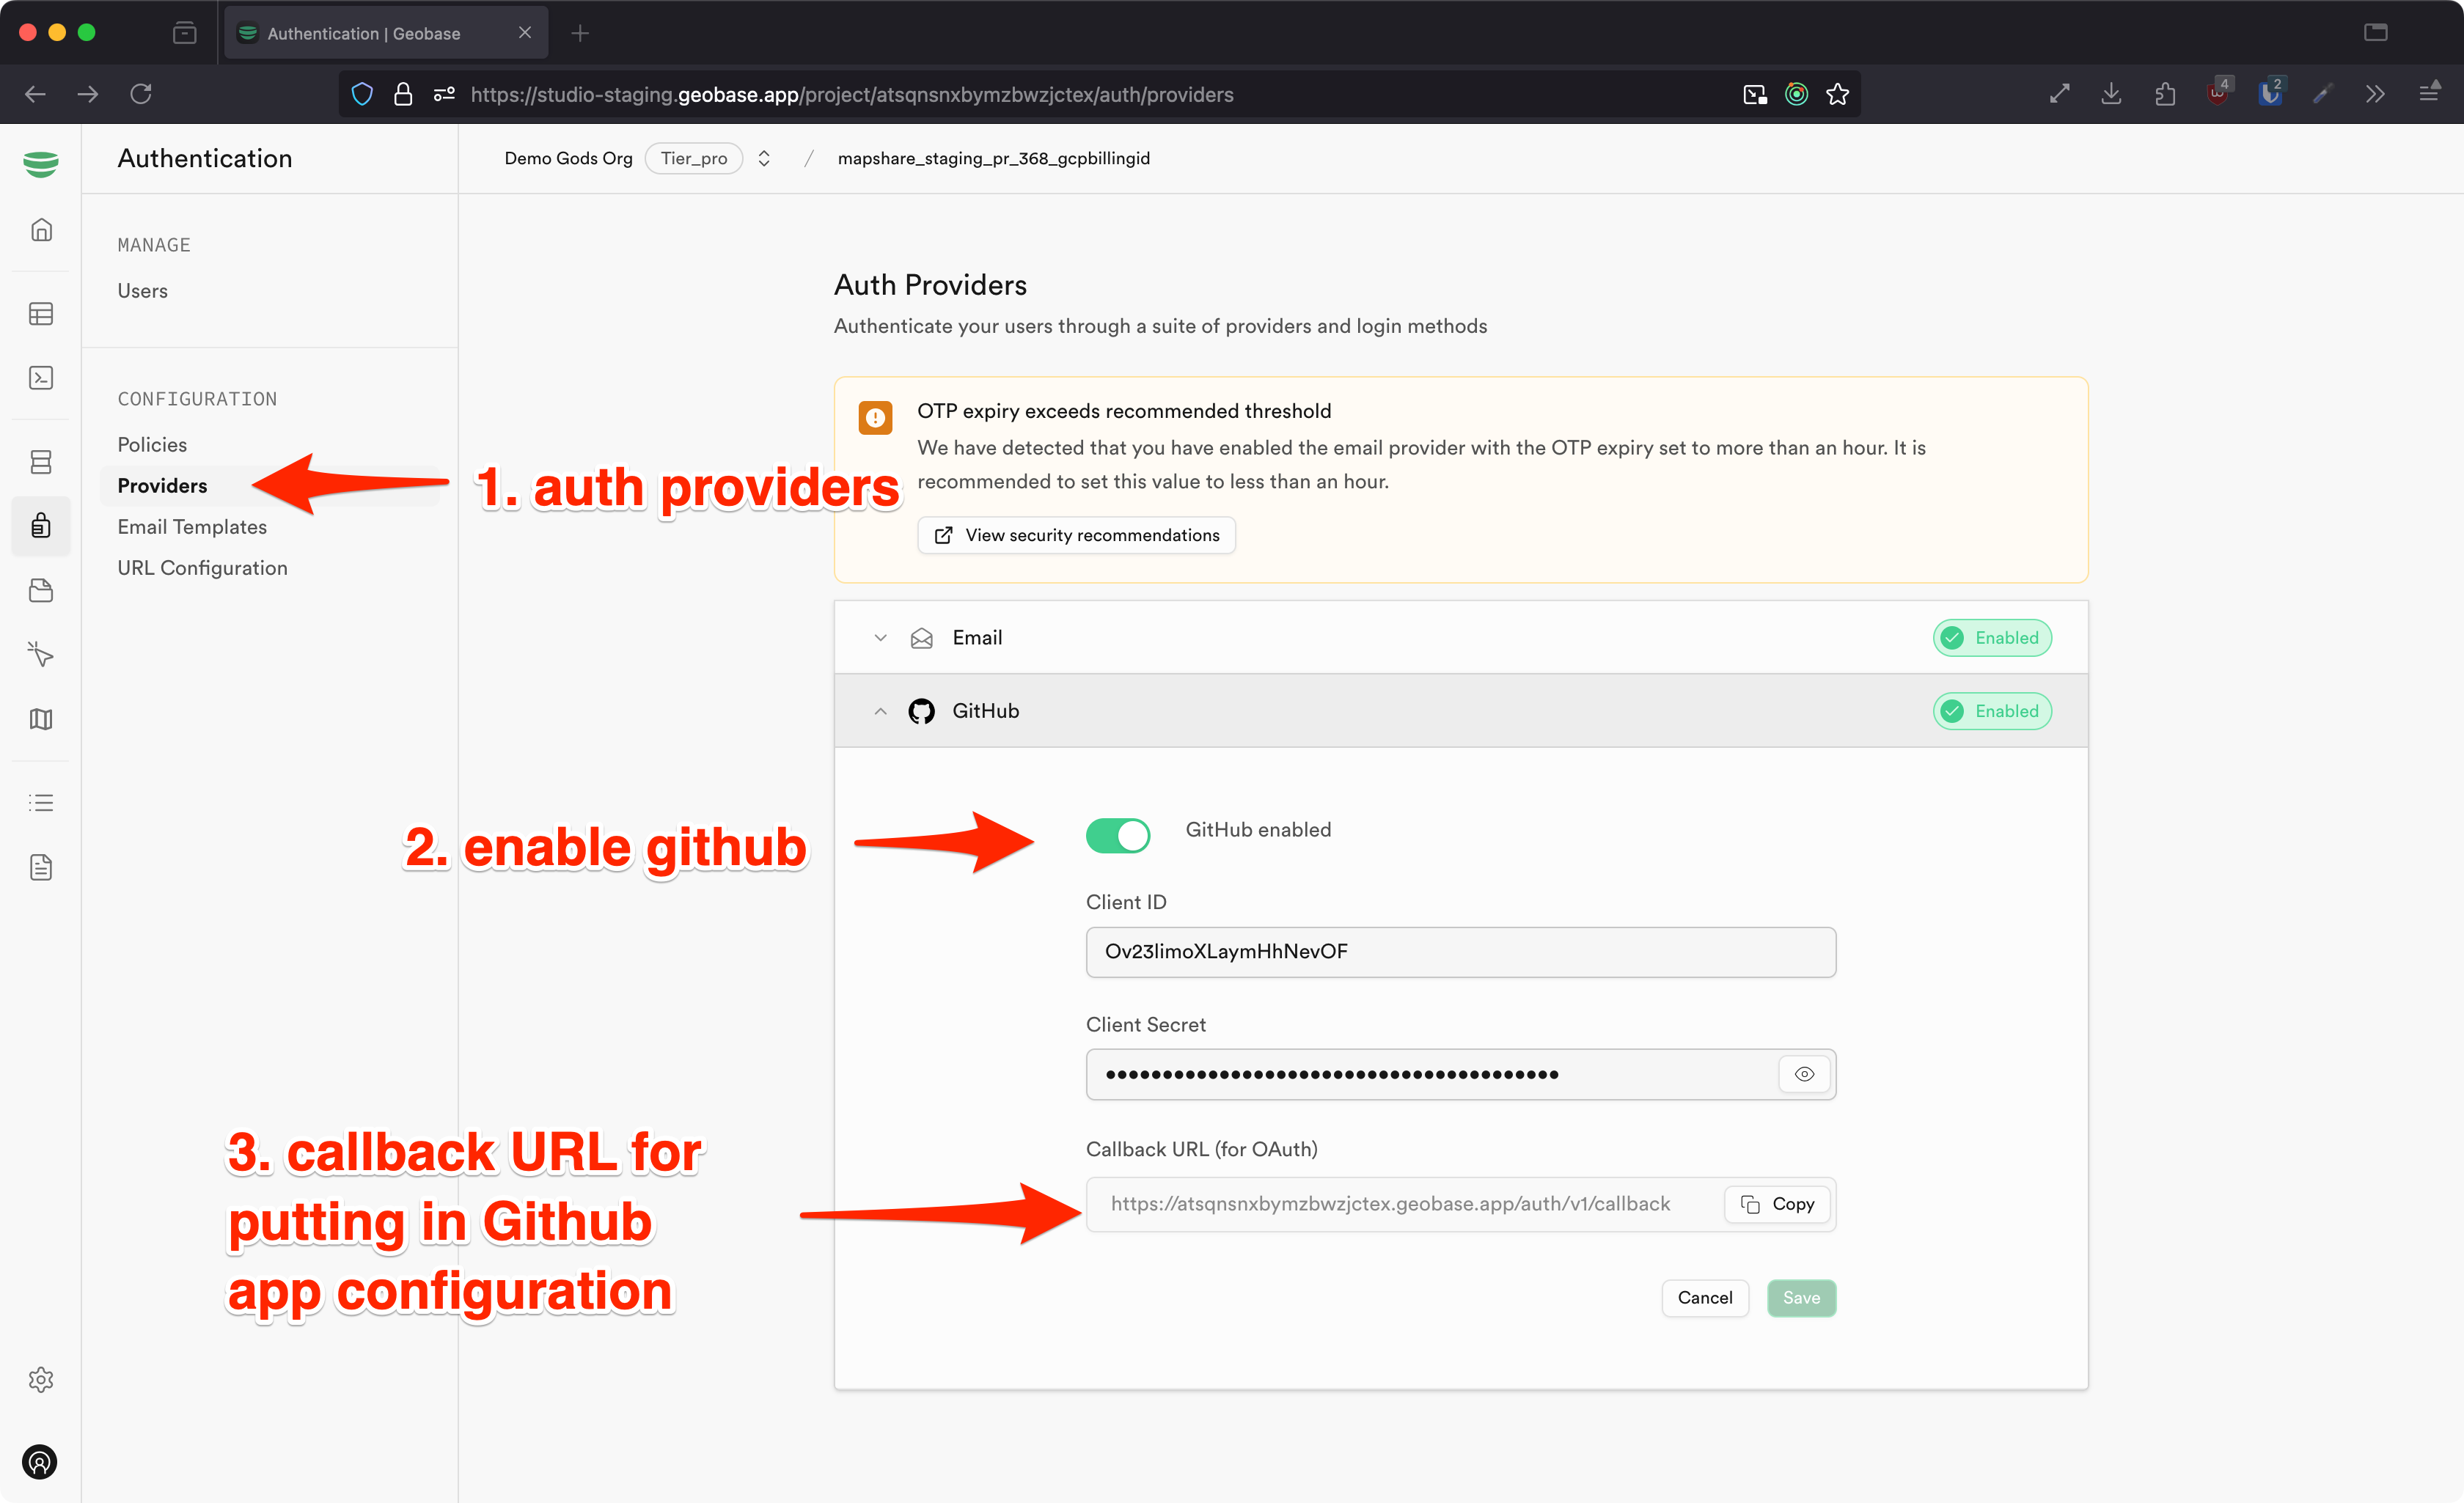
To integrate GitHub as an authentication provider, follow these steps:
- Enable GitHub in Geobase Studio: In the Authentication tab, go to Providers and enable GitHub.
- Create a GitHub OAuth App: In GitHub’s developer settings, create a new OAuth app. Set the callback URL to match the URL shown in Geobase Studio’s auth provider settings. Save the client ID and secret for later.
- Add Credentials in Geobase Studio: Return to Geobase Studio and enter the client ID and secret under the GitHub provider settings.
GitHub Auth Provider
Deploy this application seamlessly with Vercel, the creators of Next.js. Refer to the Next.js deployment guide for specific deployment instructions and setup options.
Deployment
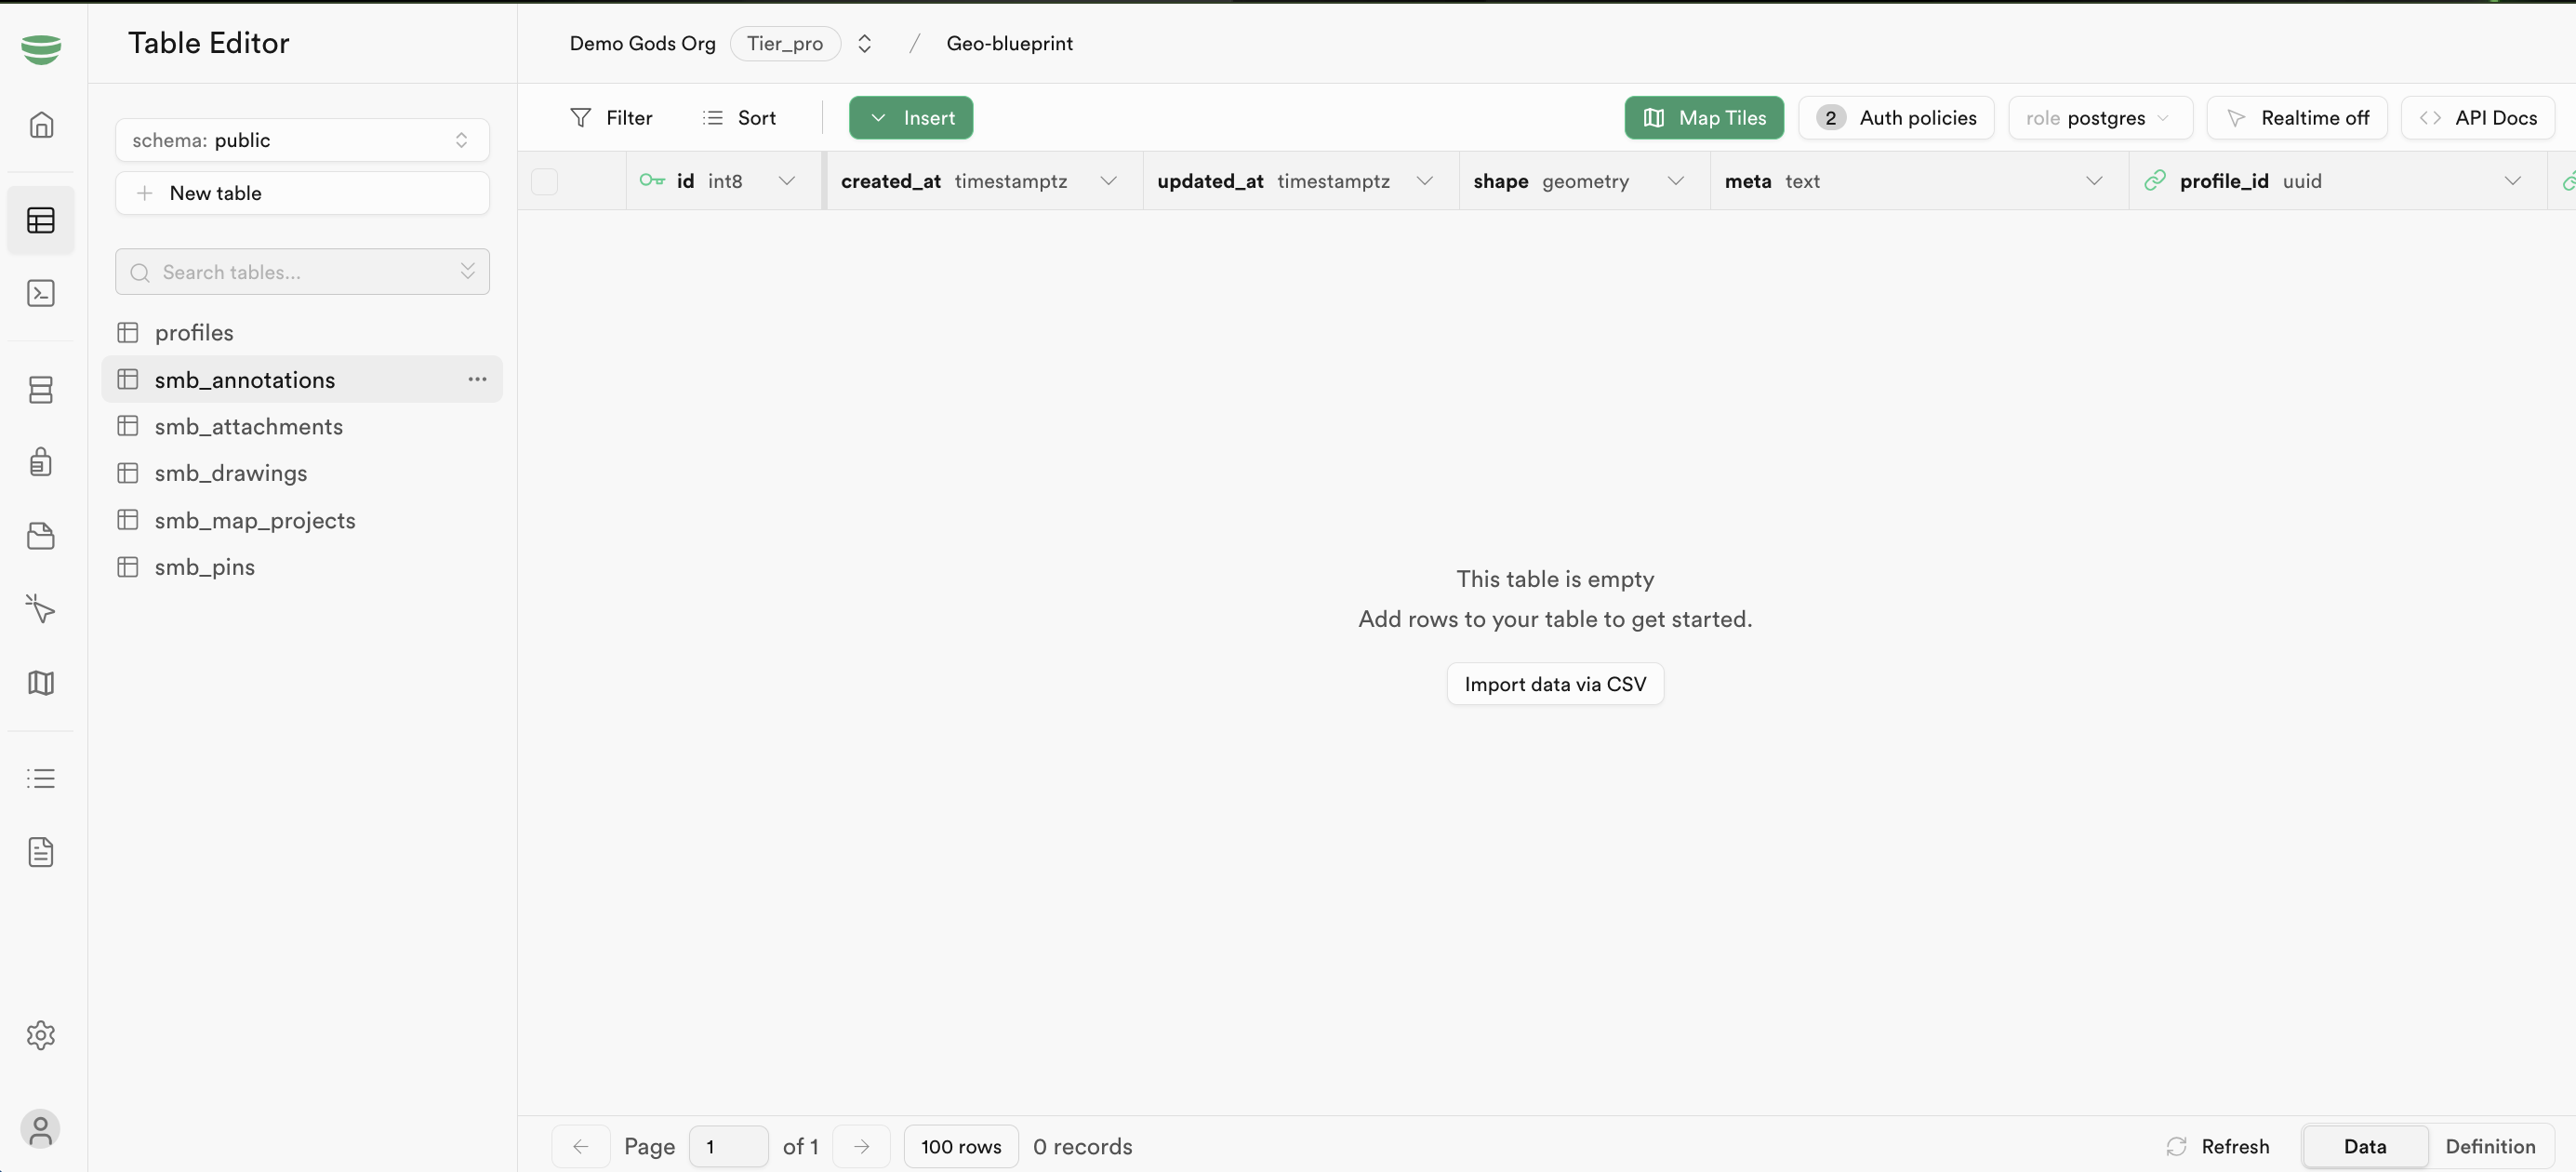
This blueprint’s database is structured to support user profiles, map projects, and associated map elements like pins, drawings, and annotations. Here’s a summary:
Database Overview
public.profiles: Stores user profile data.public.smb_map_projects: Holds details about map projects.public.smb_drawings: Stores line drawings associated with map projects.public.smb_pins: Contains pin locations for maps.public.smb_annotations: Maintains annotations related to map projects.
🗺️ Note: Items like drawings, pins, and annotations are served as vector map tiles using the Geobase automatic tile server.
Tables
Functions:
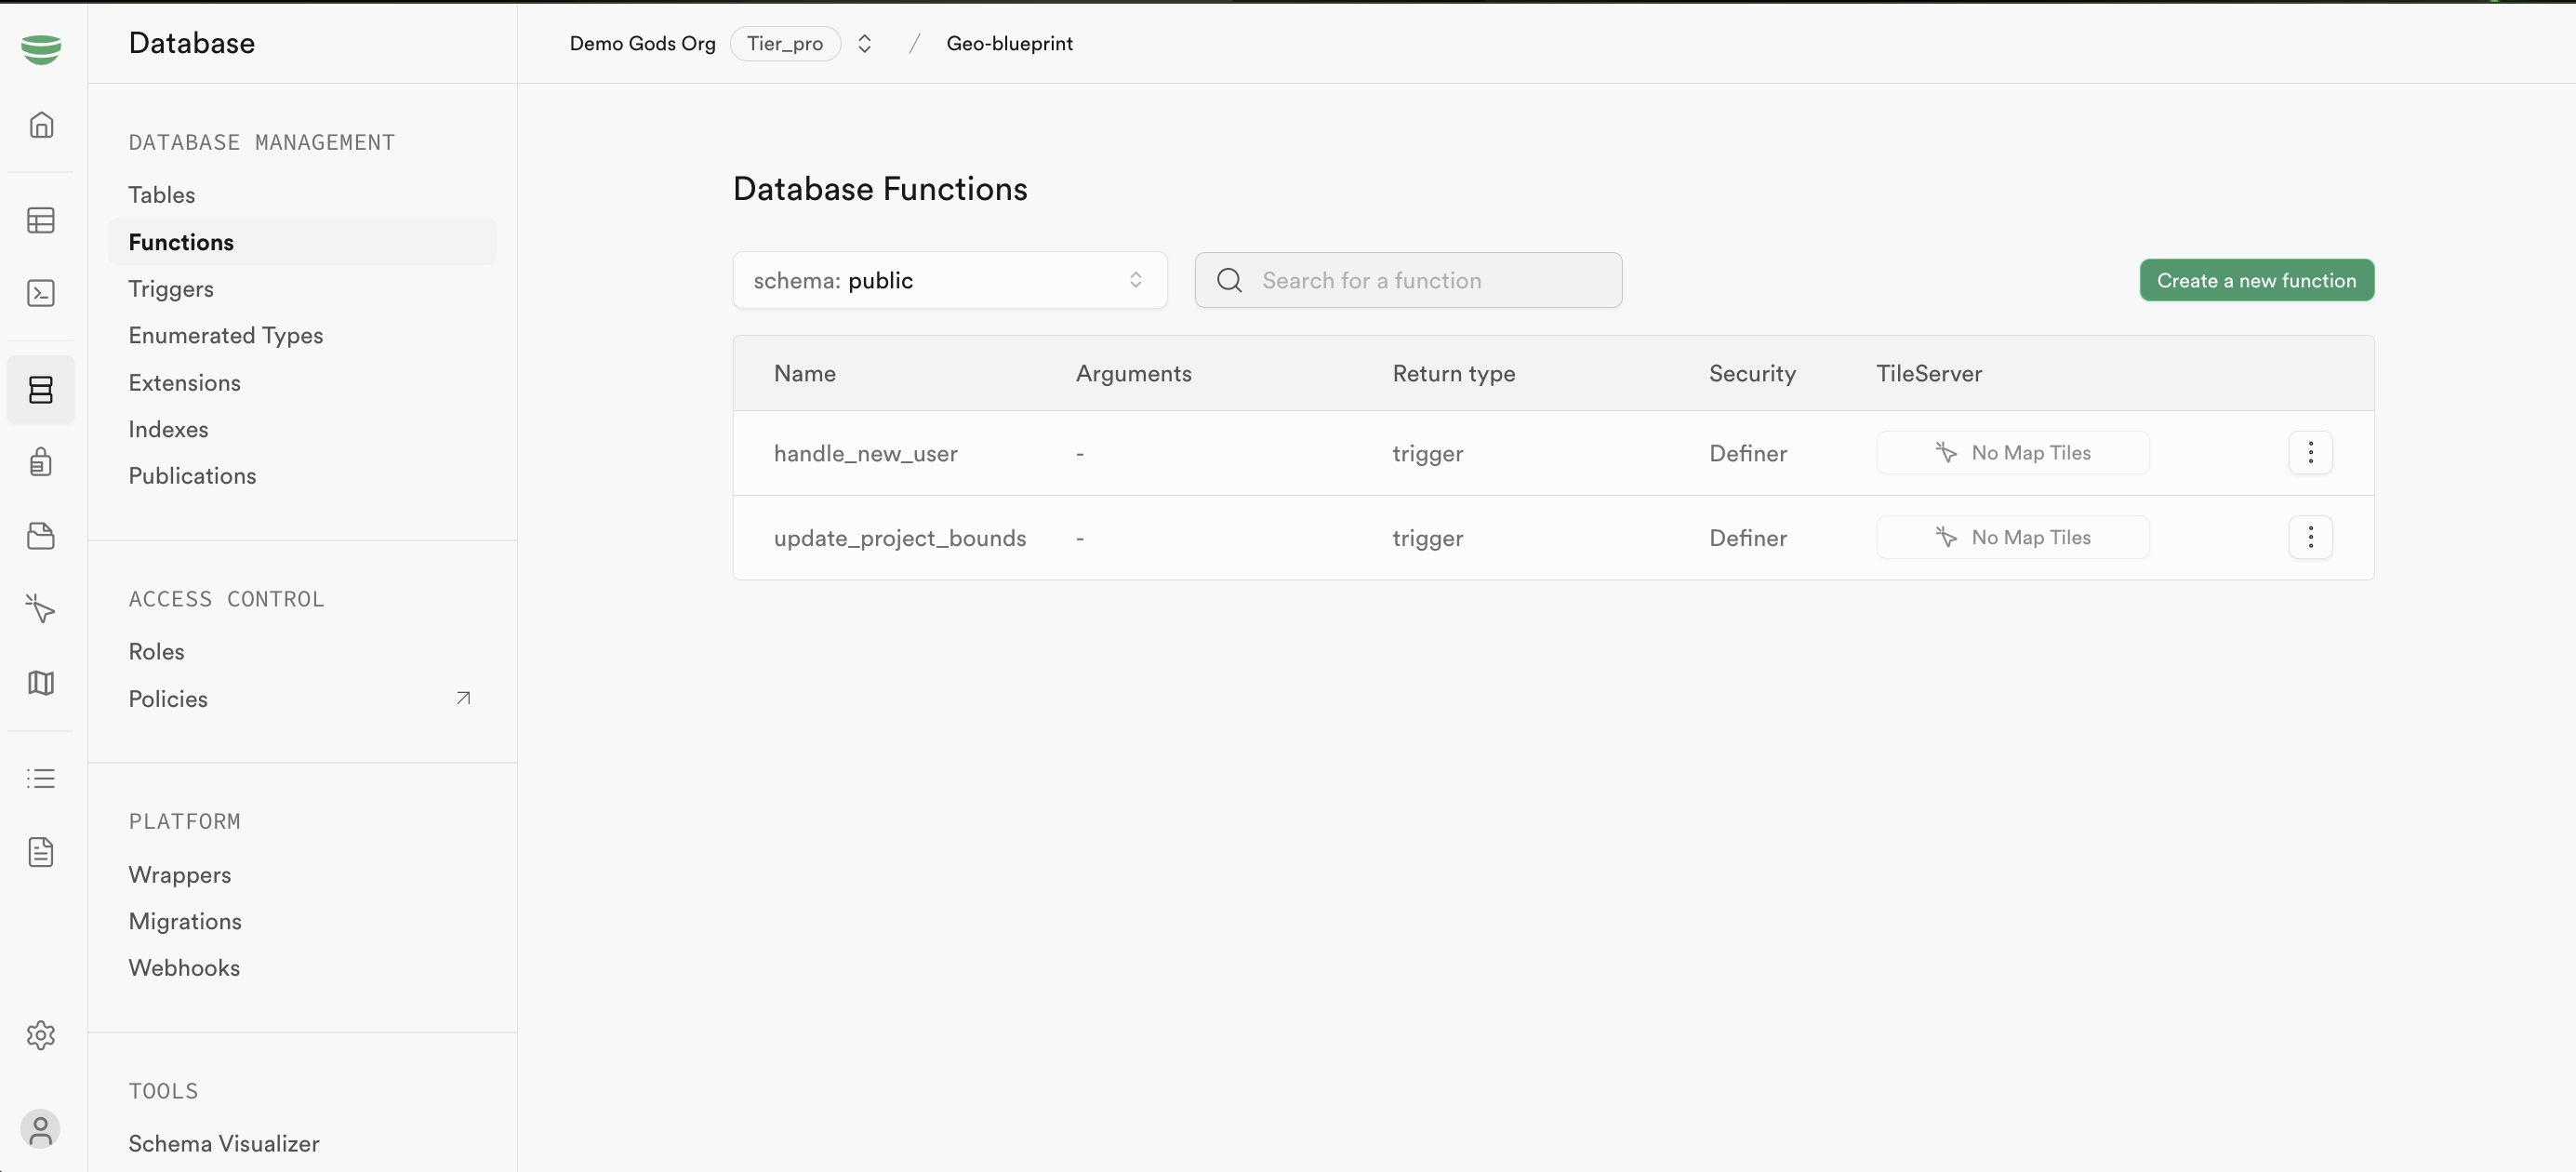
public.handle_new_user(): Adds a profile row for new users.public.update_project_bounds(): Adjusts map project boundaries when changes are made to pins, drawings, annotations, or attachments.
Triggers:
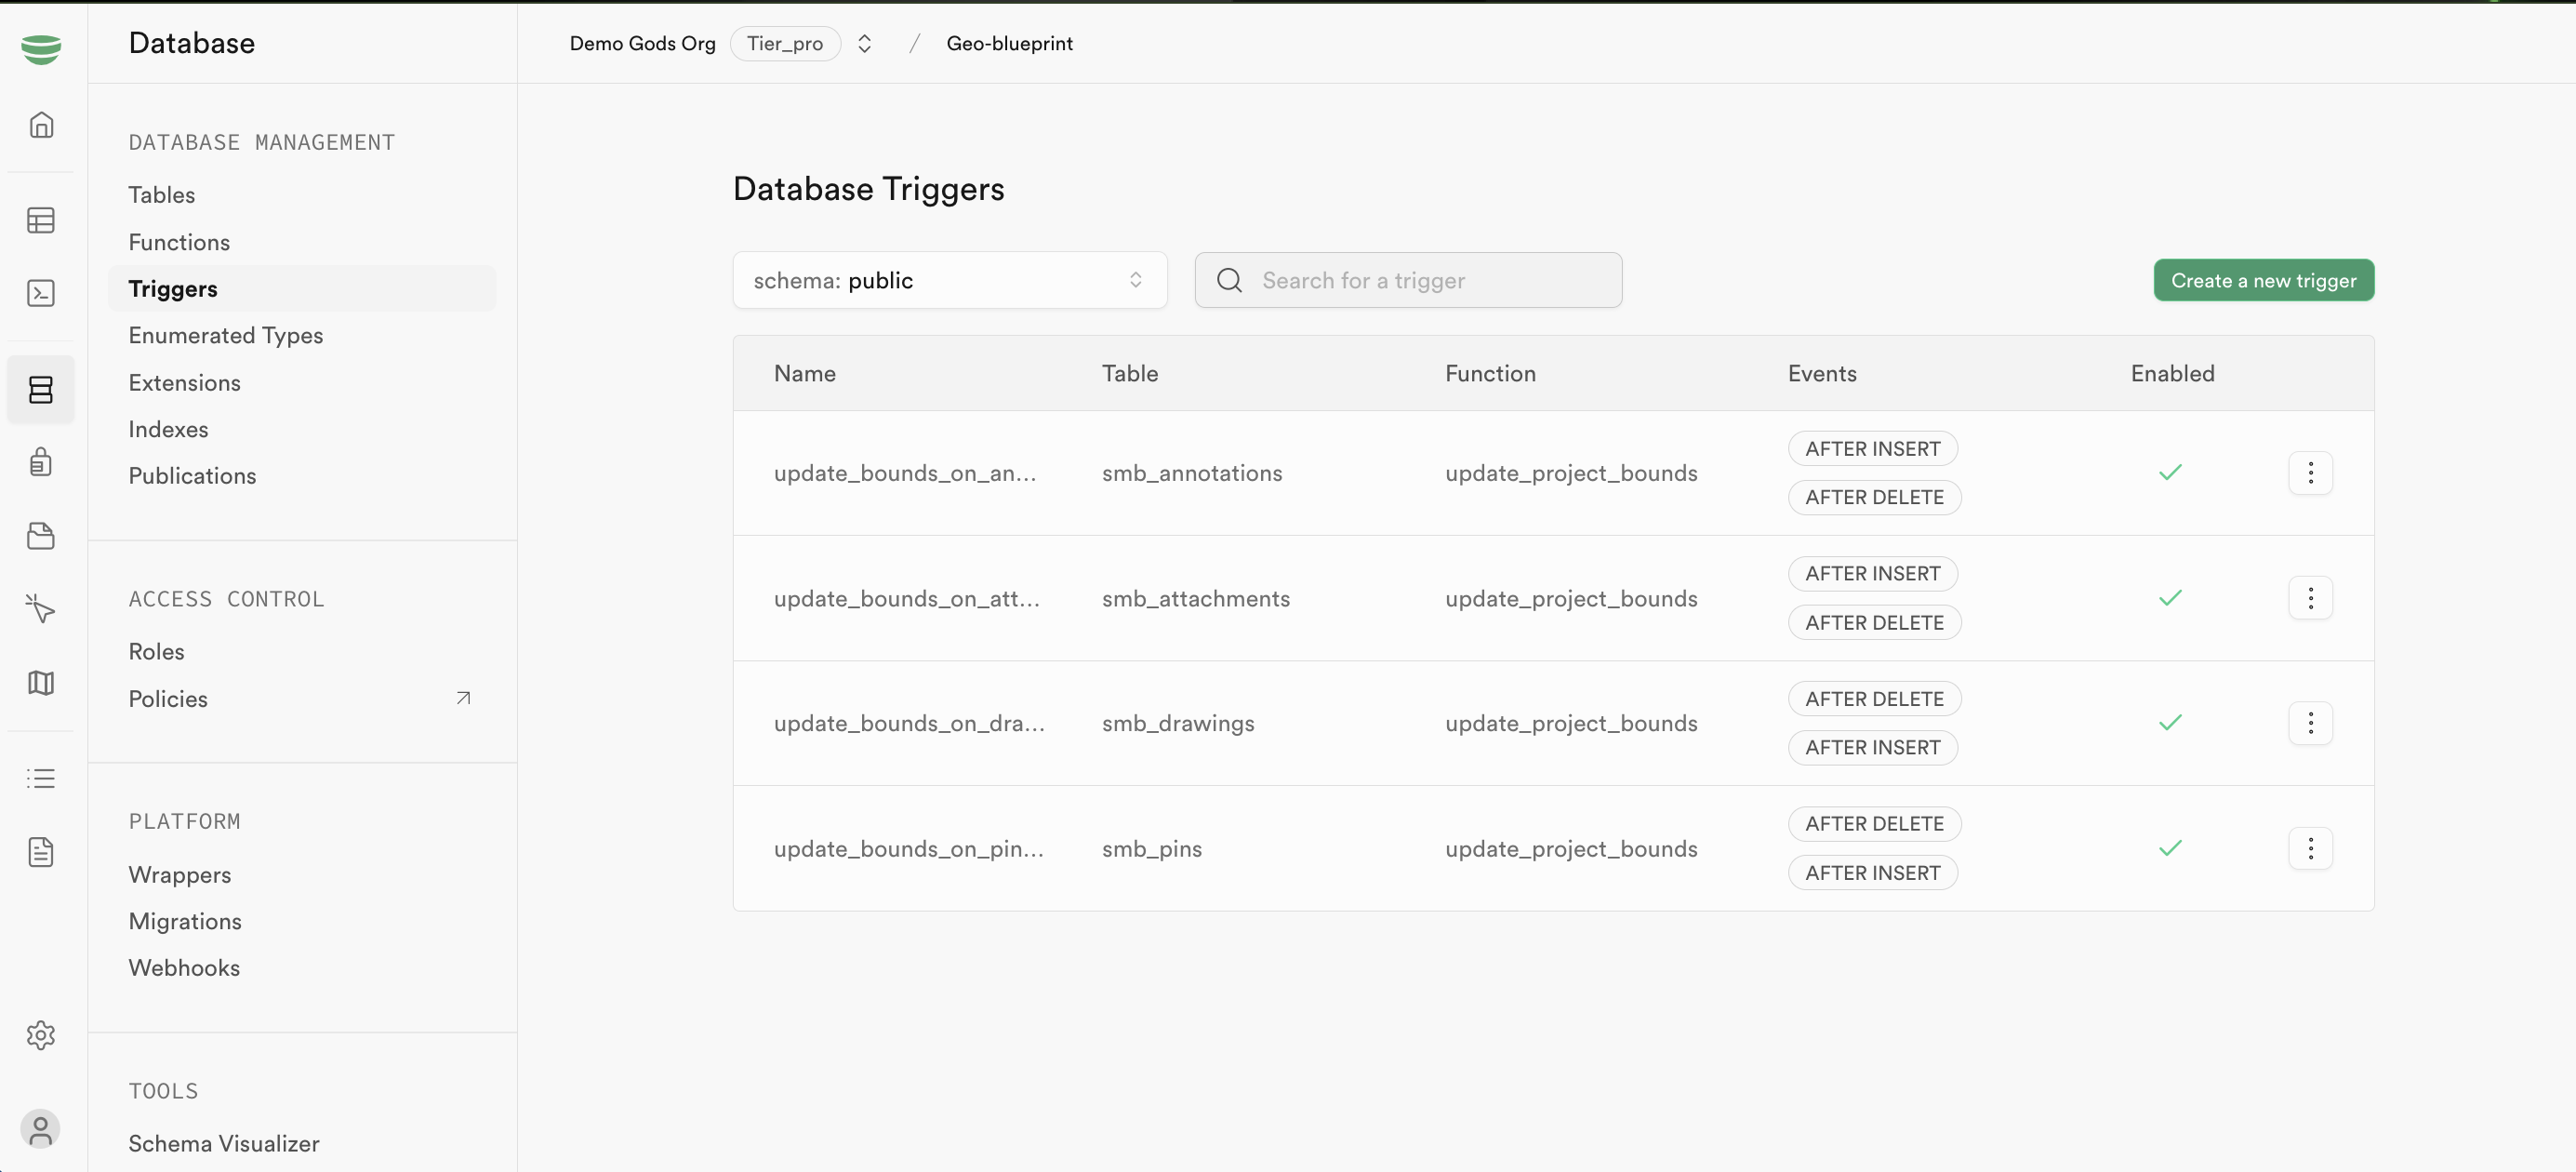
on_auth_user_created: Callshandle_new_user()when a new user is created.- Boundary Update Triggers: Update map bounds when drawings, pins, annotations, or attachments change.
Triggers & Functions
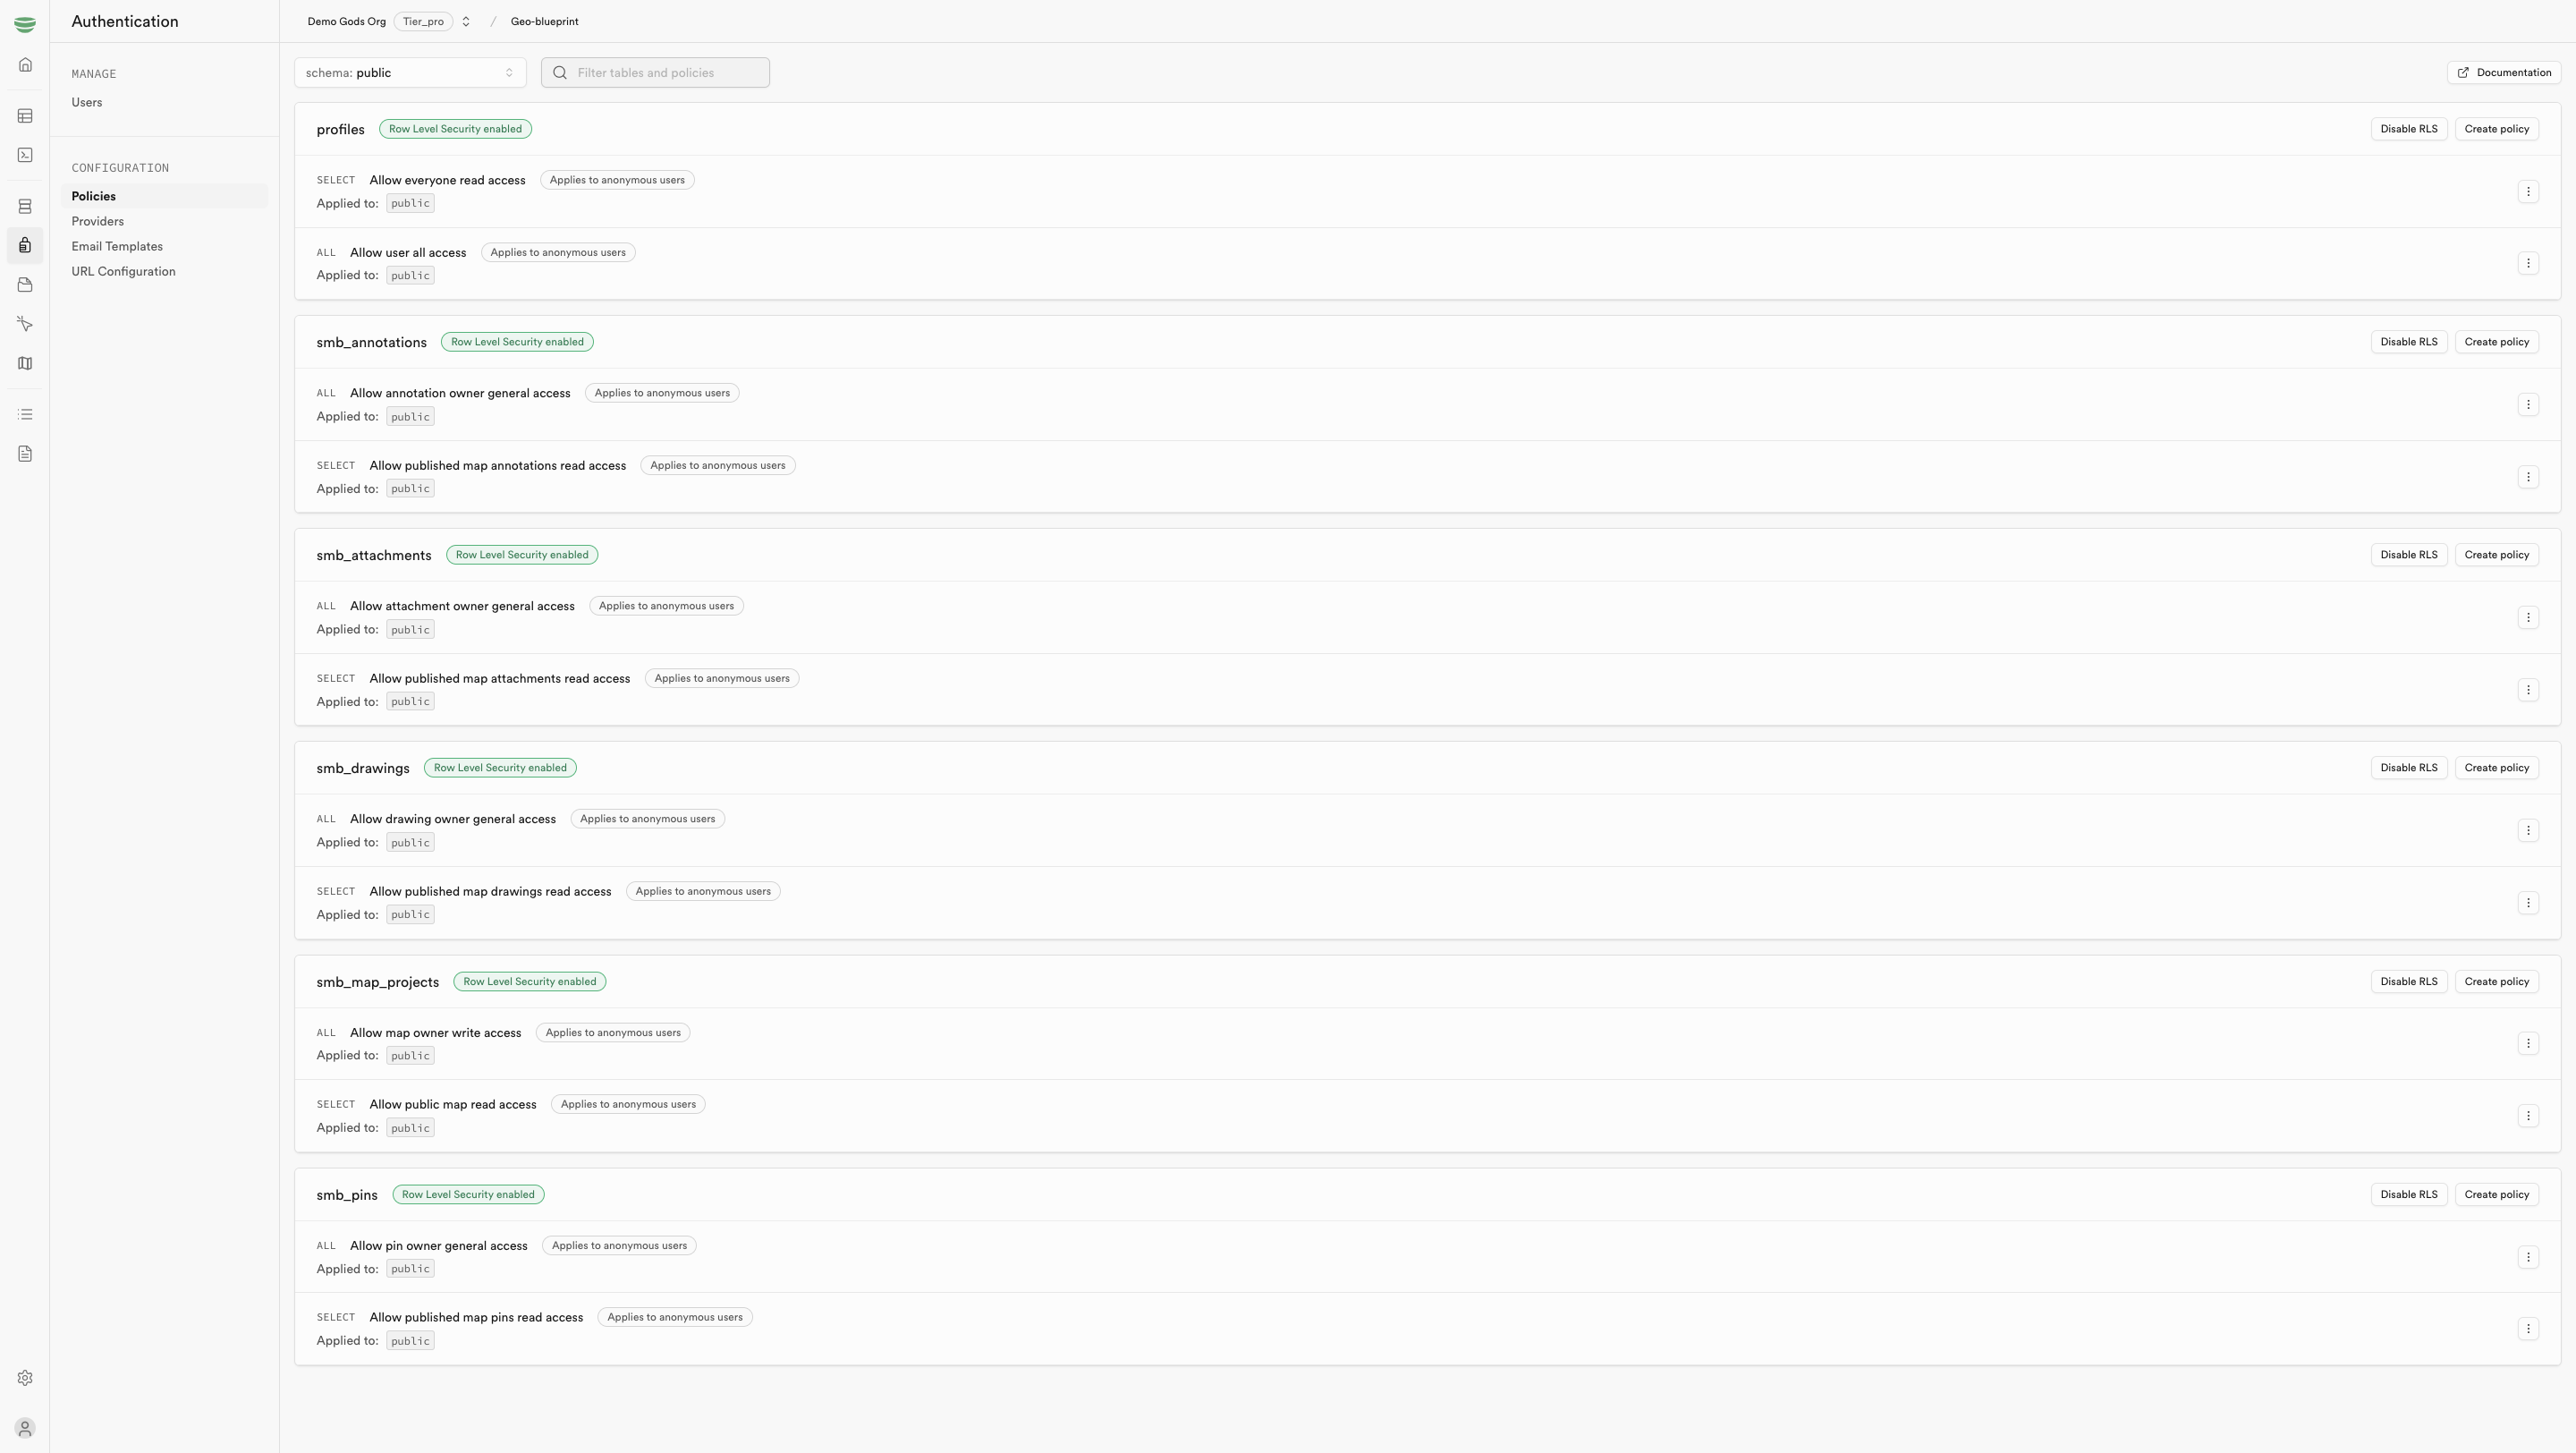
RLS policies ensure secure, private access to table data:
- Profiles: Users can read/write their own profile. All profiles are readable by the public.
- Map Projects: Public can read published projects, but only project owners have full access.
- Map Elements (drawings, pins, annotations): Public can view published items; owners have full control.
- Storage Policies: Policies for the avatars bucket are applied to manage avatar access.
Row Level Security (RLS)
This project follows a modular structure using shadcn/ui for UI components, organized as follows:
- UI Components: The core building blocks (e.g., buttons, inputs) are located here.
- Views: Higher-level compositions that combine UI components into specific user flows.
- Providers: Components providing state and utility functions for data management and app functionality.
Blueprint Structure
For additional information, refer to:
For support, reach out on Discord.
Learn More
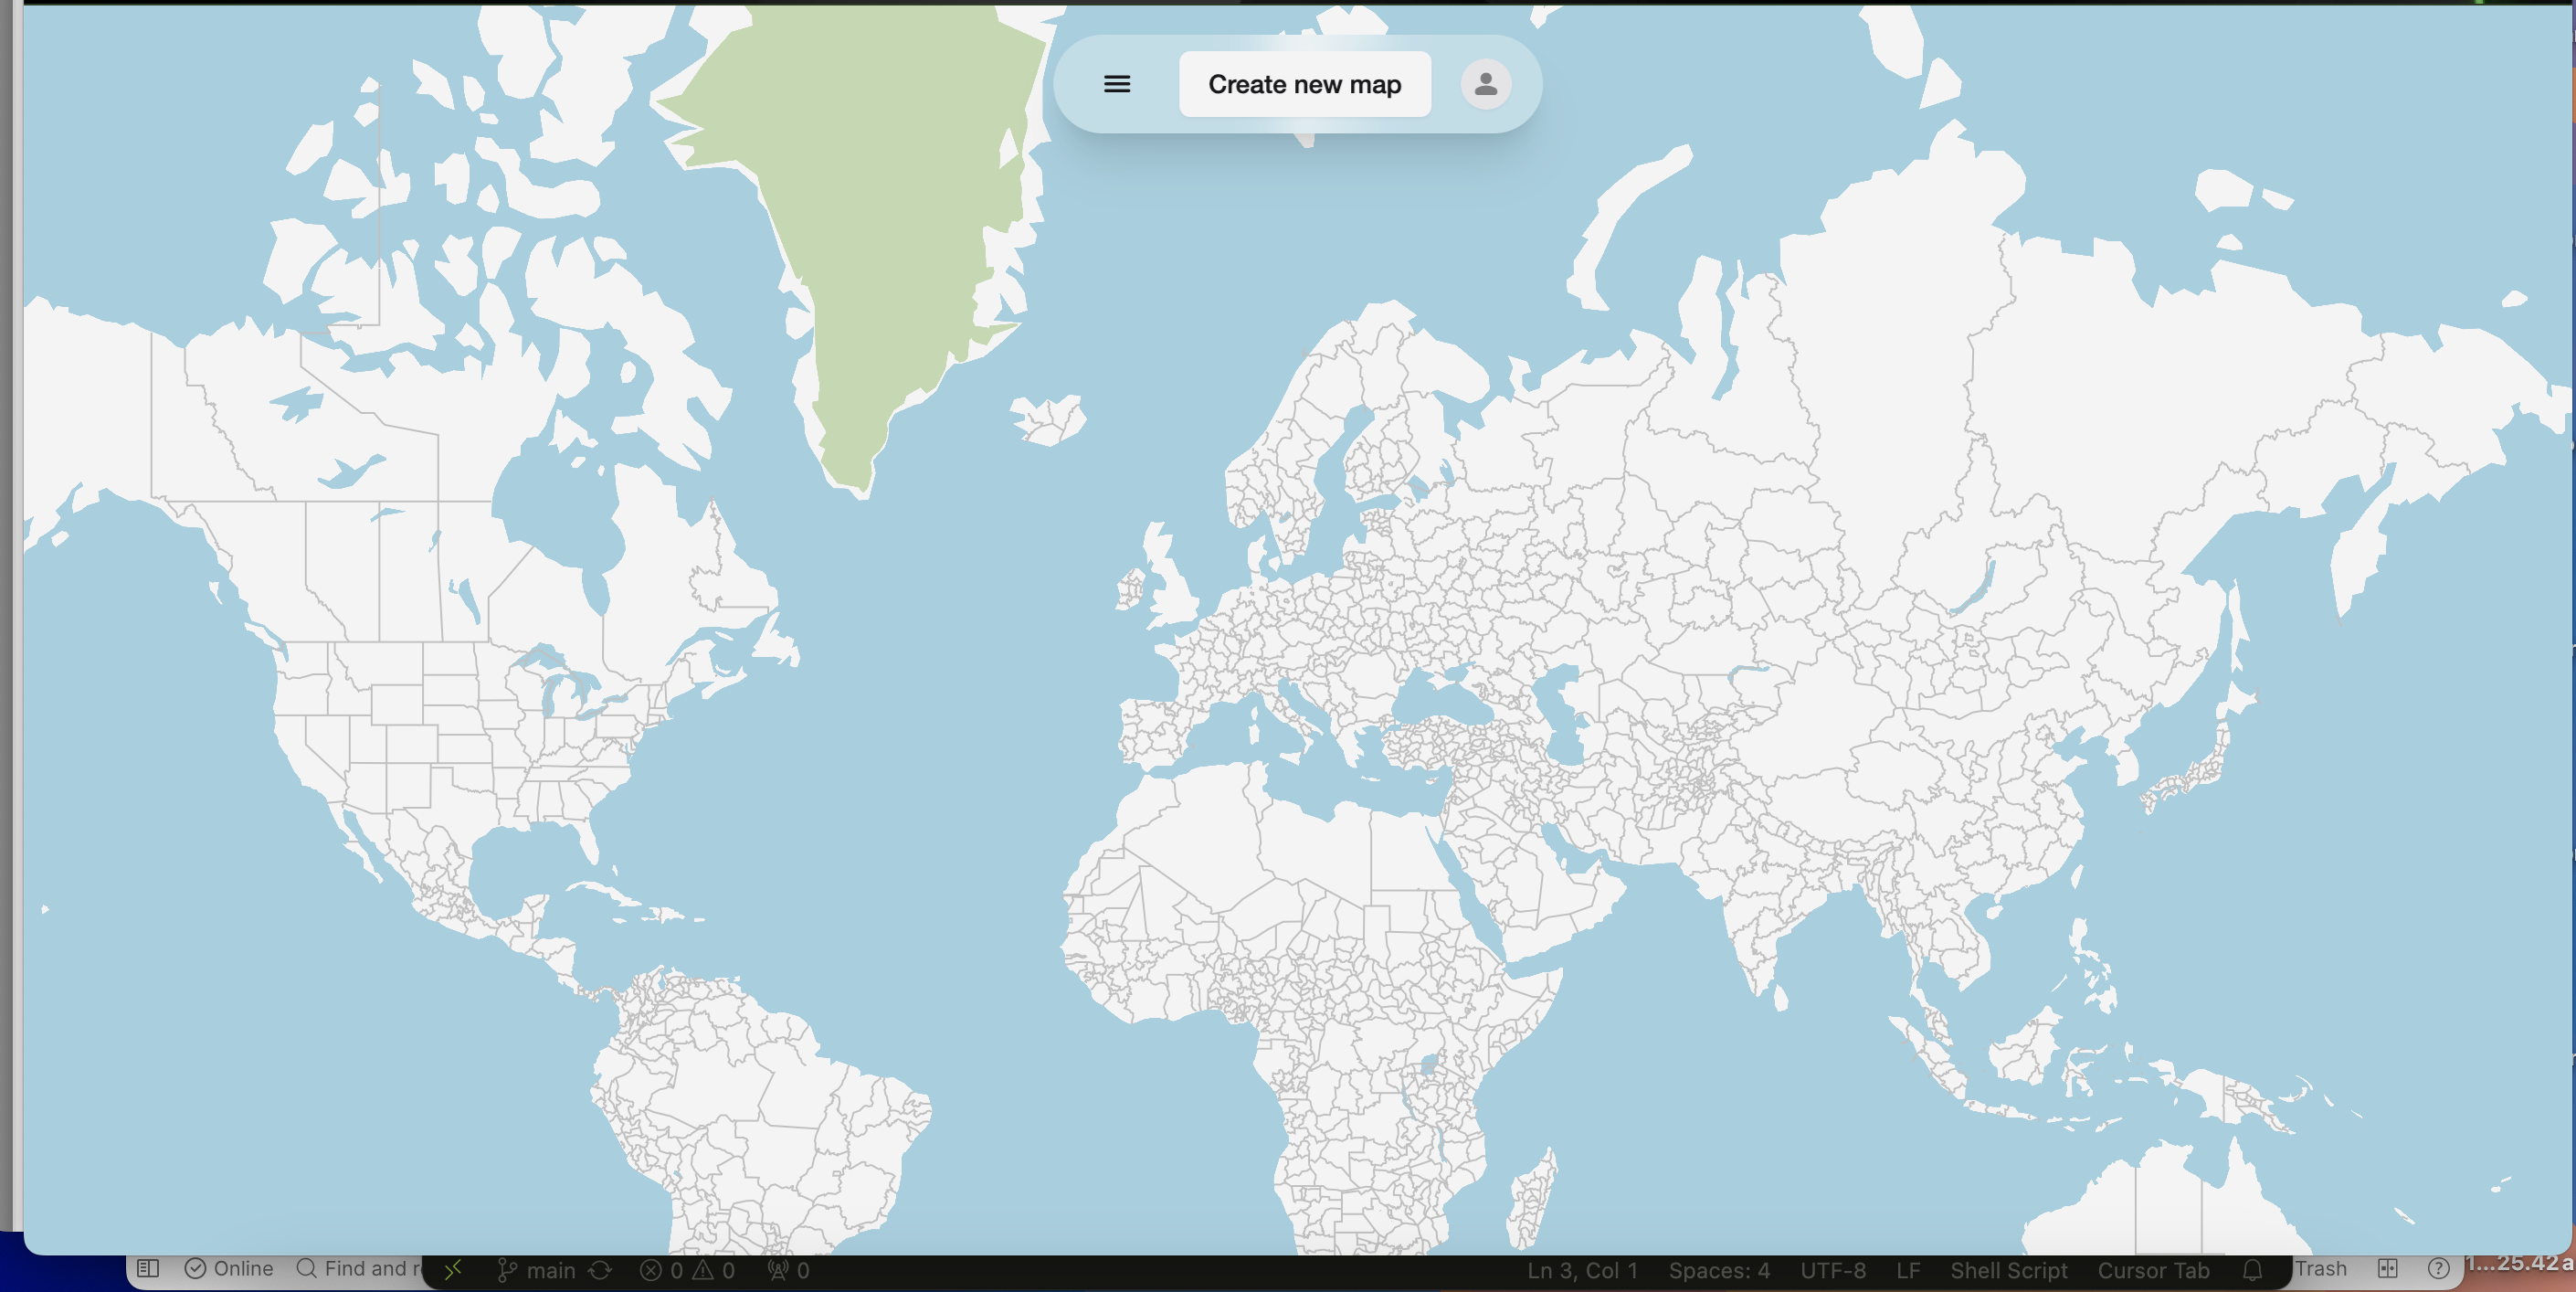
After successfully setting up and running your local environment, you’ll be greeted with a welcoming landing page featuring an interactive map. This is your starting point for exploring the application’s capabilities.
To begin using the application, click on the login/signup button. This will guide you through the authentication process. Once you’ve logged in or signed up, you’ll be seamlessly redirected to your personalized map board, where you can start creating and managing your map projects.
Using the Application
By following this blueprint, you’ve successfully set up a shareable maps application using Next.js and Geobase. This guide has walked you through the essential steps, from initializing your project to deploying it on Vercel. With the robust features provided by Geobase, you can now create, manage, and share interactive maps with ease. Continue exploring the capabilities of your application and consider expanding its functionality by integrating additional features or services. For further assistance or to connect with other developers, don’t hesitate to join our community on Discord. Happy mapping!